Do you want to do do more than just simple email marketing with the leads and contacts you gather on your Squarespace website? I don't blame you.
In this tutorial, we'll show you how to integrate Squarespace with Drip, the world's easiest and most powerful marketing automation platform.
Get Drip for Free
Automate Your Marketing for Free.
Before We start, Why Integrate Squarespace with Drip?
The easy answer is two-fold:
Time
Money
Unpacking that a little more, marketing automation tools like Drip are a great way to automate manual tasks that sap the already limited time we have to dedicate to our marketing.
And unlike basic email marketing tools like Mailchimp, which have recently included some piecemeal automation features, Drip is among the class of tools that make all sorts of things easier and faster.
Why kind of things?
At the building block level, you can created completely automated workflows filled with emails, decisions, forks, delays, one-off emails, purchase notifications and more.
These features help you save time by completely automating the process of sending campaigns, assisting sales teams, qualifying leads, fulfilling orders, and much, much more.
What you'll need to integrate Squarespace with Drip
Squarespace doesn't yet integrate with Drip natively, but that shouldn't stop you from being able to experience all of those sweet, sweet automation benefits.
To integrate Squarespace with Drip, you'll need the following tools:
A Squarespace account: Set one up here
A Drip account: Set one up here
A Google Drive account: Set one up here
A Zapier account: Set one up here
Once you've created these accounts, which are all free on top of your existing Squarespace subscription, you can proceed to the next section of our guide, which will walk you through exactly how to integrate Squarespace with Drip.
Let's get started on saving you time and making you more money!
Step 1: Connect a Squarespace Form to A Google Sheet
The first thing we'll need to do is to get new submissions from your Squarespace forms out of Squarespace using one of the three supported methods:
Email
Google Sheets
Mailchimp
Our method for integrating Squarespace and Drip involves Google Sheets.
Find the form in Squarespace that you want to send to Drip.
Next, navigate to the Storage tab within the Edit Form interface.
Enter the name of the Google Sheet you want to send new form submissions to. Squarespace will automatically create a new Google Sheet if you enter a name of a document that doesn't yet exist.
The name of the Google Sheet document we're looking for is: Contact Big Picture Web.
Save your changes and you're done with step one. Easy, right?
Step 2: Connecting Your Google Sheet with Zapier
The next step involves getting new contacts/leads/entries in your Google Sheet over to Drip.
In order to do this, we're going to enlist one of the most helpful tools on the entire planet for marketers, Zapier.
Imagine you have data or information about a person in one tool (e.g., Google Sheets) and you wanted to send that information to another tool (e.g., Drip).
Zapier is like a switchboard operator for your different marketing tools.
In this next step. You'll see how to get information from that Google Sheet into Zapier.
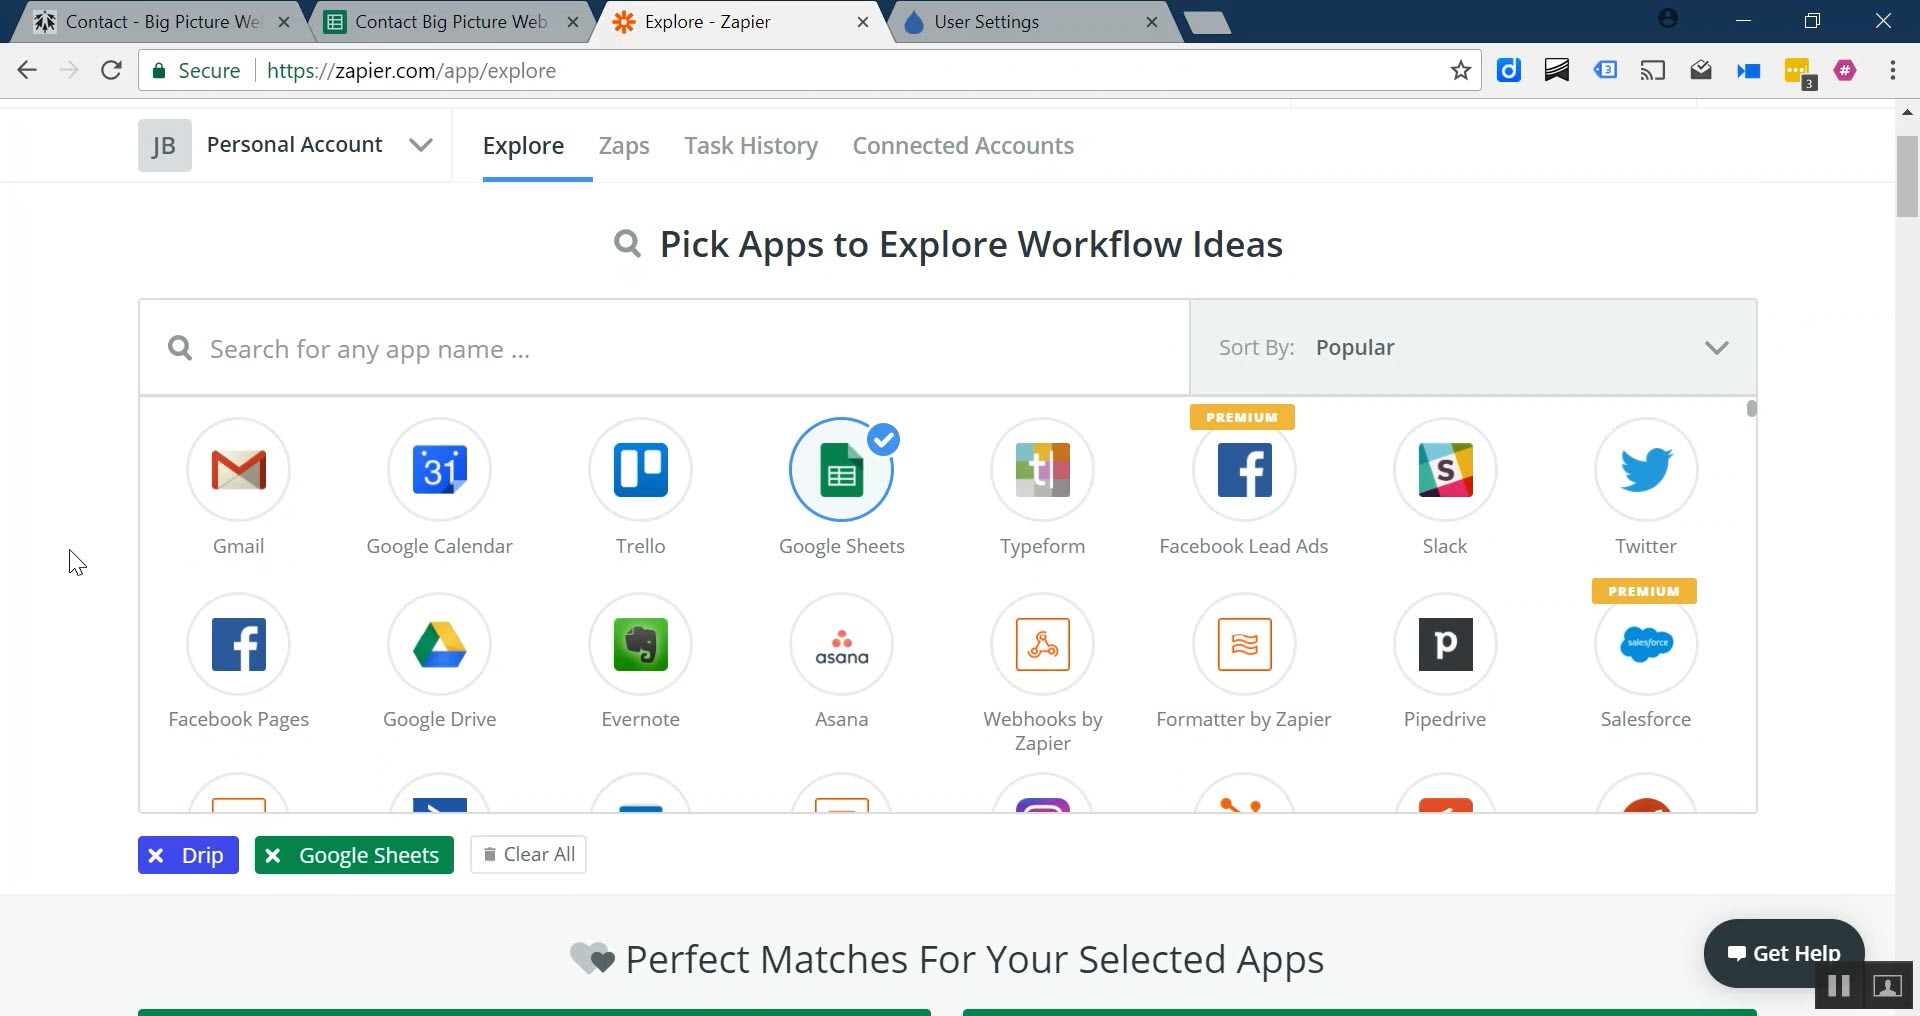
Assuming you've created a Google Sheet and a Zapier account, head to the Zapier directory and search for both Google Sheets and Drip.
Search for Google Sheets and Drip in the Zapier Explore directory.
Look for the Zap—this is what Zapier calls an automation rule—called "Create or update Drip subscriber from new row in Google Sheets".
Once you've found it, click on "Use this Zap."
Follow the simple steps in the wizard to connect to a Google Account and select the sheet you want to sync with Squarespace.
You've just completed the second step of our tutorial. High five!
Step 3: Connecting Zapier With Your Drip Account
The last step of our simple little process is to complete our Zapier rule setup to connect it with your Drip account.
Follow the prompts from Zapier to go through the different authentication requests to connect your Drip/Squarespace/Zapier accounts together.
If you get stuck at any point, refer to the video above. There are a lot of clicks, but they're easy clicks, so we should be OK.
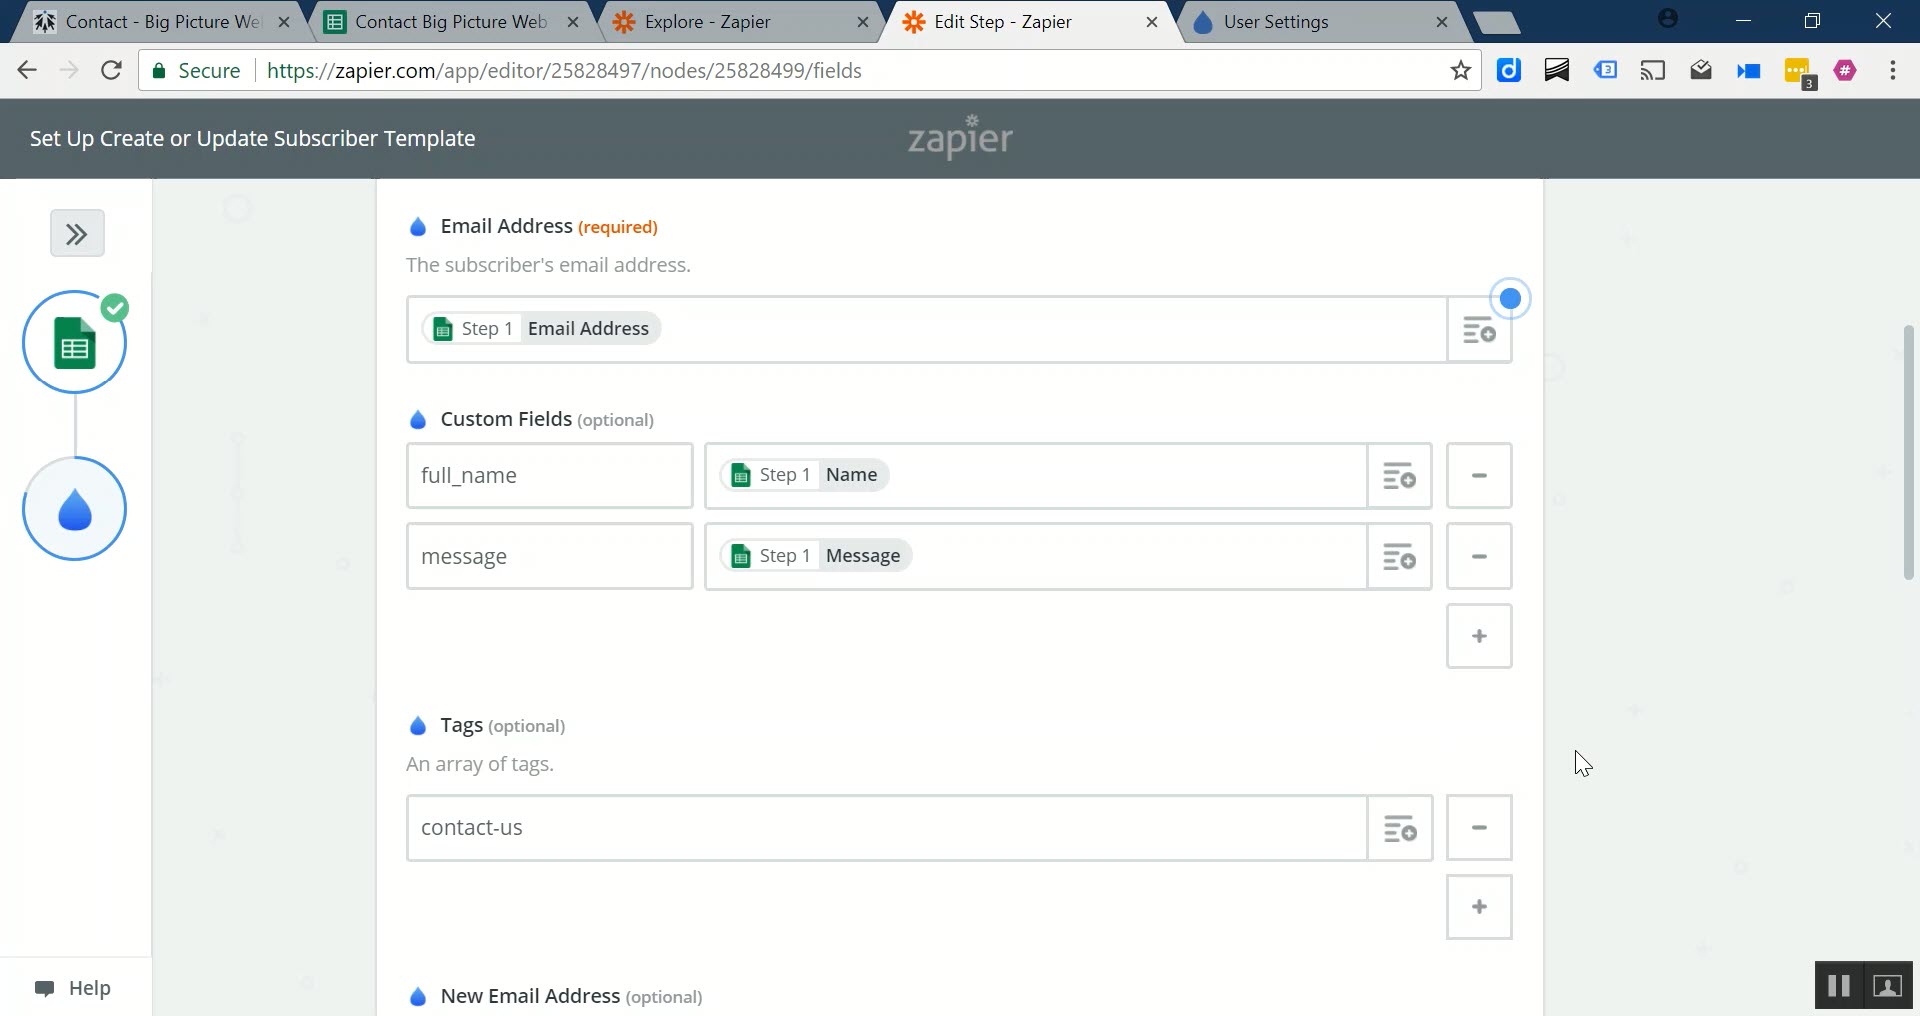
At some point, you'll be faced with this screen, which will ask you how you want to map fields from your Squarespace form into Drip.
We recommend doing at least these three things:
Mapping an Email Address is required. Select the appropriate field from your Google Sheet to designate the field for the Drip Email Address field.
Select the advanced options link to set addition custom fields in Drip. Take note of the conventions suggested in the video above.
Tag new submissions of a Squarespace form uniquely. For example, we're tagging people with a contact-us tag when the form is filled out on our Contact page.
Once you've gone through the wizard on the Zapier website, you'll get a confirmation that your Zap is active and that all your new form submissions on your Squarespace website are headed to Drip.
Excellent! Except, let's test it out to make sure it works.
Testing Out Your New Drip and Squarespace Integration
Once you've completed all of these steps, you should be able to test things out by sending a test submission through your Squarespace form.
Wait about five minutes—the minimum time between you Zapier Zap—and then check to see that the subscriber has been added to Drip.
Validate that your new Zap is working by examining your new contacts in Drip.
If everything looks like you'd expect, then you're all set.
Drip and Squarespace are now tied at the hip, affording you untold marketing automation capabilities above-and-beyond what you can do with the default form capture options Squarespace offers.
Squarespace and Drip are Integrated. Now What?
Once you've integrated Squarespace and Drip, the next step is to automate all the different parts of your marketing using Drip's marketing automation capabilities.
We'll be posting a lot more in the future about what are the highest revenue opportunities in marketing automation and how you can experience them as a Squarespace website owner.
In the meantime, let us know in the comments or in social media whether this tutorial was helpful and if it's something you end up using to make more money online.
Until then, have a great day!


